Writing is something many of us are scared to do, don't have time for, or when we do sit down to write we don't know what to say. Blogging, and therefore writing, is essential for solo business owners to drive traffic to your website and help search engines find you. Zibster has a built-in Blog Builder that is easy to use and makes blogging a breeze. If you have never blogged before this blog post should help as we are going to walk you through the process.
In this article, we'll show you how to start a blog, use tags for search and SEO, add a blog to your website, and share your posts on your social media channels. Let's begin!
Getting Started
Log into your Zibster account and select the BLOG tab in the top navigation. This is where you will write and store all your blog posts. You'll also see the date blog posts are written and published, any comments, and views.
Click NEW to begin a new post. You'll then be prompted to enter your blog post title and author (each blog post includes a byline with the author’s name). You can edit these at any time. After you click SAVE you'll be in the blog building phase.
When building a blog post, I suggest writing your content in notepad, a Google doc, or other word processing tool. This will allow you to run spelling and grammar checks (check out Grammarly for help with this as well), and keep a copy for backup purposes, just in case the browser crashes or if your internet connection goes out. It is important to always have a backup!
Once you have written what you want to say and have your pictures selected to illustrate your points, you can start designing what the blog post looks like.
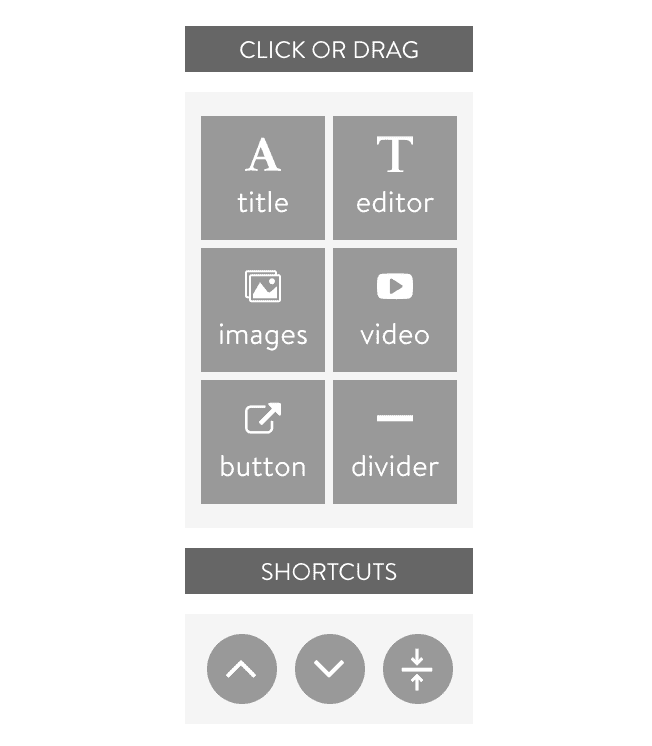
You'll see the Blog Builder is designed much like our Website Builder. There are blocks on the right side you can choose from to design your posts. Start with a TEXT BLOCK to put your words in.
Place your written text in the text editor. You can put your entire written piece in this section if you like, or you can break up your text with pictures in between paragraphs. When we write for the Zibster blog, we break it up with a couple of paragraphs then images, a couple paragraphs then images, and so on. This helps with the visual flow of the blog and keeps people engaged.
Your readers will love the visuals too! Both text and pictures are important so your blog won't feel like a novel to readers.
TIP: Use a code stripper when copying and pasting text into a blog post. If you are copying and pasting your content from a different site builder or word processor, style tags may invisibly paste along with your text resulting in unexpected text styles when you review your post. You can also remove the style tags after you paste by editing the HTML. Here are what typical style tags look like:
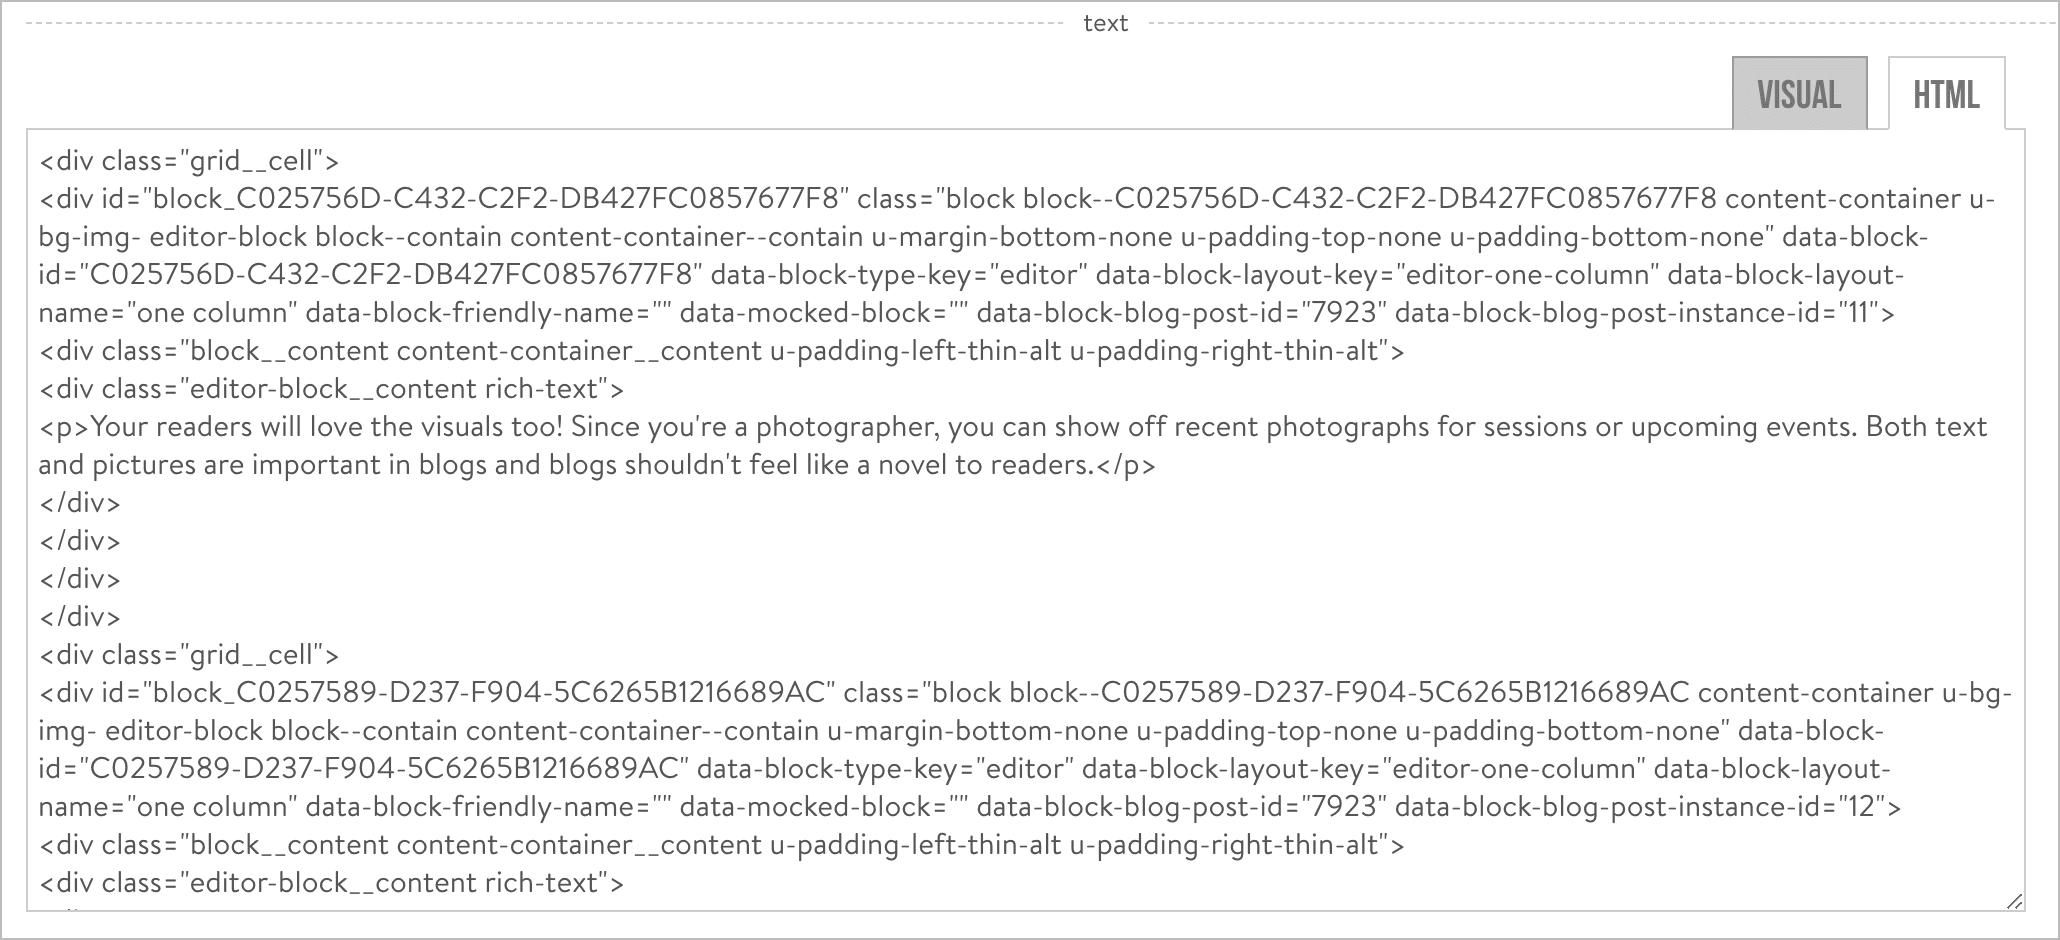
Once you have what you like in a text section, CLICK SAVE, and continue setting up your post.
Next, you can add photos by selecting the IMAGE BLOCK. In this block, you can add your pictures and style the layout of how you want the images presented.
TIP: Choose up to 10 photos to feature in a blog post. It is important for your blog post to be more than just images. Each blog post should show off photos of staff, your workspace or new products and have text and call-to-actions (CTAs) that drive people to other pages of your site. You can lead people to your online store. Your blog post should also encourage people to take the next step. If you have video content, you can embed it by adding a VIDEO BLOCK. You'll need to upload the video to your preferred platform (e.g., YouTube or Vimeo) and then get the embed code. Paste the code in the embed code section. You can add a title and description for the video if you like. Click save to continue.
There are four other types of blocks:
TITLE BLOCK: Use this block to set up sub-headers to capture people's attention and lead them through your post.
VIDEO BLOCK: You can embed your own videos by grabbing an embed code from YouTube or Vimeo.
DIVIDER BLOCK: Use this block to add a thin line between sections of your post. Dividers do as the name implies, they help to visually break up information.
BUTTON BLOCK: Use this block to add buttons as a CTA. For example, you can give readers options to learn more or make a purchase. Buttons are great to get people's attention to dive deeper into your website.
Once you have set up your post and added some images and CTAs, you're almost ready to publish it. Next, you need to tag your blog for search and SEO.
Tagging & SEO
Tagging is essential to blogging, and it's easy. Tags are used to organize your content and help with onsite search (that means searches within your website). You can access the tag settings for your blog post in the upper left corner of the blog builder. CLICK THE ADD A TAG ICON (highlighted in the pink square in the screenshot below):
You should tag posts based on how you think people will search your site or how you want the content displayed on your website. For example, if you set up seasonal menus (e.g., summer seasonal menu, fall seasonal menu), you can set up tags to organize your blog posts about menus and set up pages to only display blog posts with this specific tag. This can help guide people who might be looking for what's changed on the menu before they come to your restaurant.
Tags are a great way to create a good user experience and clear organization of your posts.
Now, let's tag a blog and review how to display it on our site.
TAGGING
CLICK THE ADD A TAG ICON and you'll be prompted with this pop up for tags. If you own a restaurant, you'll want to tag your post in a few ways, here are some example tags:
-
Summer Menu
-
Seasonal Menu
-
Summer Seasonal Menu
-
Type of restaurant
-
Geographic location of where you restaurant is
-
Your most popular food items
-
Anything unique to your restaurant
Once you have set up your tags, CLICK SAVE.
NOTE: You must save the tags you set up. If you don't click save, your blog will not be tagged.
Now your tags are set up for your blog post. This will be helpful when choosing which blog posts to display where on your website. You can choose to show all of your blog posts on a page or you can set up pages to display only post with specific tags. It's up to you how you want to display your content.
SEO
TAGS are a great way to help people searching within. By creating tags you create creating searchable words on your site for your blogs, products, and services. These tags carry over as KEYWORDS for you blog, you can use those and add more for SEO.
You can add custom SEO to your blog posts from the Blog Builder. CLICK THE GEAR ICON TO SEE THE SEO SETTINGS. Here you can add or modify the page title, meta description, and meta keyword.
This information is great for Google and other search engines to learn about the content of your blog post. Search engines crawl the text on your website, including your blog posts, and your title and meta descriptions are displayed in search results to encourage people to follow the link to your website.
Here is an example:
BLOG TITLE
Your blog title is a brief & accurate description of your business/topic. Appears in both search and open website browser tabs.
The optimal length is: 55-60 characters.
Example: "Summer Seasonal Mexican Lunch & Dinner Menu".
META DESCRIPTIONS
Your meta description should summarize your blogs content. Search engines use this to give users a brief summary of the page/website before they click in it.
The optimal length is: 50-155 characters.
Example: "Yummy Burrito's Summer 2020 Seasonal Menu. Fresh new offerings from Atlanta's favorite Mexican restaurant. Photos of each new dish."
META KEYWORDS
Keywords and phrases should be unique, separated by commas, and relevant to the content of your blog. You should use no more than 15 keyword phrases per blog to avoid being penalized by search engines.
Example: "Yummy Burrito Seasonal Menu, Summer Seasonal Menu, Mexican Restaurant, Summer Menu..."
That's it. Save your SEO settings and when you publish your blog post, this information will be associated with your post. There are complex algorithms to determine page rankings in search engines, but the important part to know is the more relevant your post is to the keywords people search and the more engagement your post receives, the higher it will rank.
Publishing Your Blog
Before you hit PUBLISH, you have a few options to set up. To access these, CLICK THE GEAR ICON:
Post title & author: These fields can be used to modify your post title and author.
NOTE: If you're going to make any changes to this, do this before you hit publish and share. Any shared links will not display if you modify the title. The title controls the URLs link address.
Cover Image: You can set this to display the first image on the blog, or you can upload a custom image to display for your blog post.
SEO: Add meta descriptions and keywords (see the section on Tagging & SEO above).
Disable comments: Choose if you want people to leave comments on your posts or if you want this feature to be disabled.
Save your changes to these settings and then you are one step closer to publishing your blog post.
-
When you are ready for your post to go live, click the green PUBLISH button. A window will pop up and you will be asked to select when you want to publish the blog post.
-
Draft: When you start writing your blog, it is set up as a draft so no one can see it until you are ready.
-
Schedule Publishing: You can select when you want the post published. This can be either a date and time in the future or the past. Publish Now: This option will immediately make the post live.
Choose when you want to publish your post or leave it as a draft if you aren’t ready to go live yet and CLICK SAVE CHANGES.
Adding Your Blog To Your Website
In order for people to see your blog posts on your website, you need to add at least one blog page on your site that will display a collection of your posts. To do this go to the Website Builder tab, when you're in the builder section you will see the BLOG BLOCK on the right side of the page builder section. Click and drag where you want your blog to appear on the page.
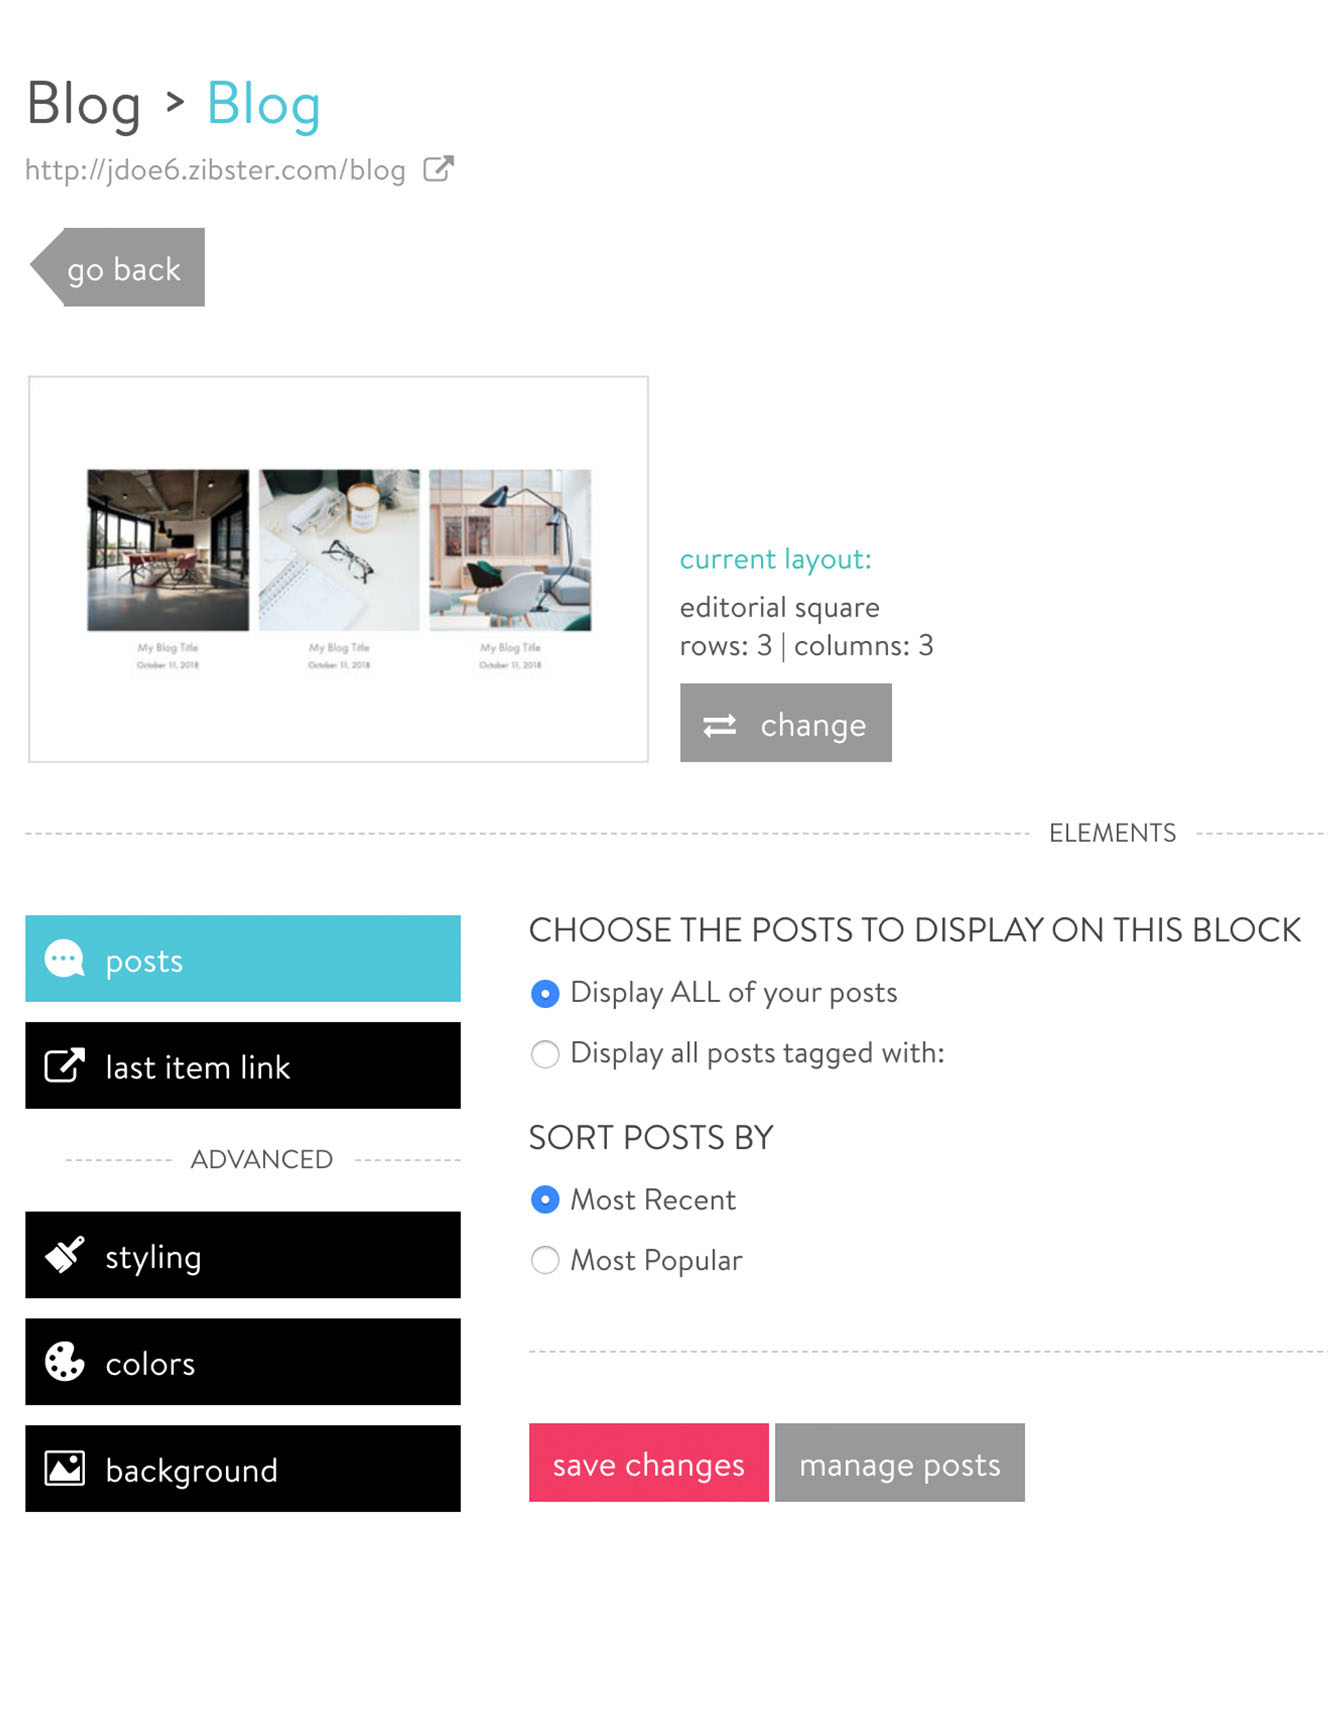
Once you have the blog block in the page builder, click on it to modify its options. In the BLOG BLOCK SETTINGS, you have options for styling layout options and which blog posts or tagged blog posts you want to display. These settings include:
Display ALL your posts: This will display every blog post, unfiltered.
Display all post tagged with: This will show specific blog posts based on the tags you select.
You can also choose to sort the blog posts by most recent or most popular. This means what order you want the blog posts to appear on the page.
Once you choose which blogs you want to display and the order in which you want them to display, CLICK SAVE.
Now let’s look at how you set up the layout, styling, and color of the blog posts.
Go through the design LAYOUT OPTIONS and choose how you want them to display. Select how you want your blog posts to be laid out on the page you select. The pictures accompanying the blog posts (the cover images you select) can display on a blog page in many formats, including as squares and circles. SAVE AND RETURN TO THE BLOG BLOCK SETTINGS.
To optimize the load time of the page featuring your blog posts, we recommend turning on the LAST ITEM LINK option. When you have more than 10 blog posts displaying on a page, this will add a LOAD MORE POSTS button. It is a similar concept of going to the next page except you are staying on the same page and loading additional posts.
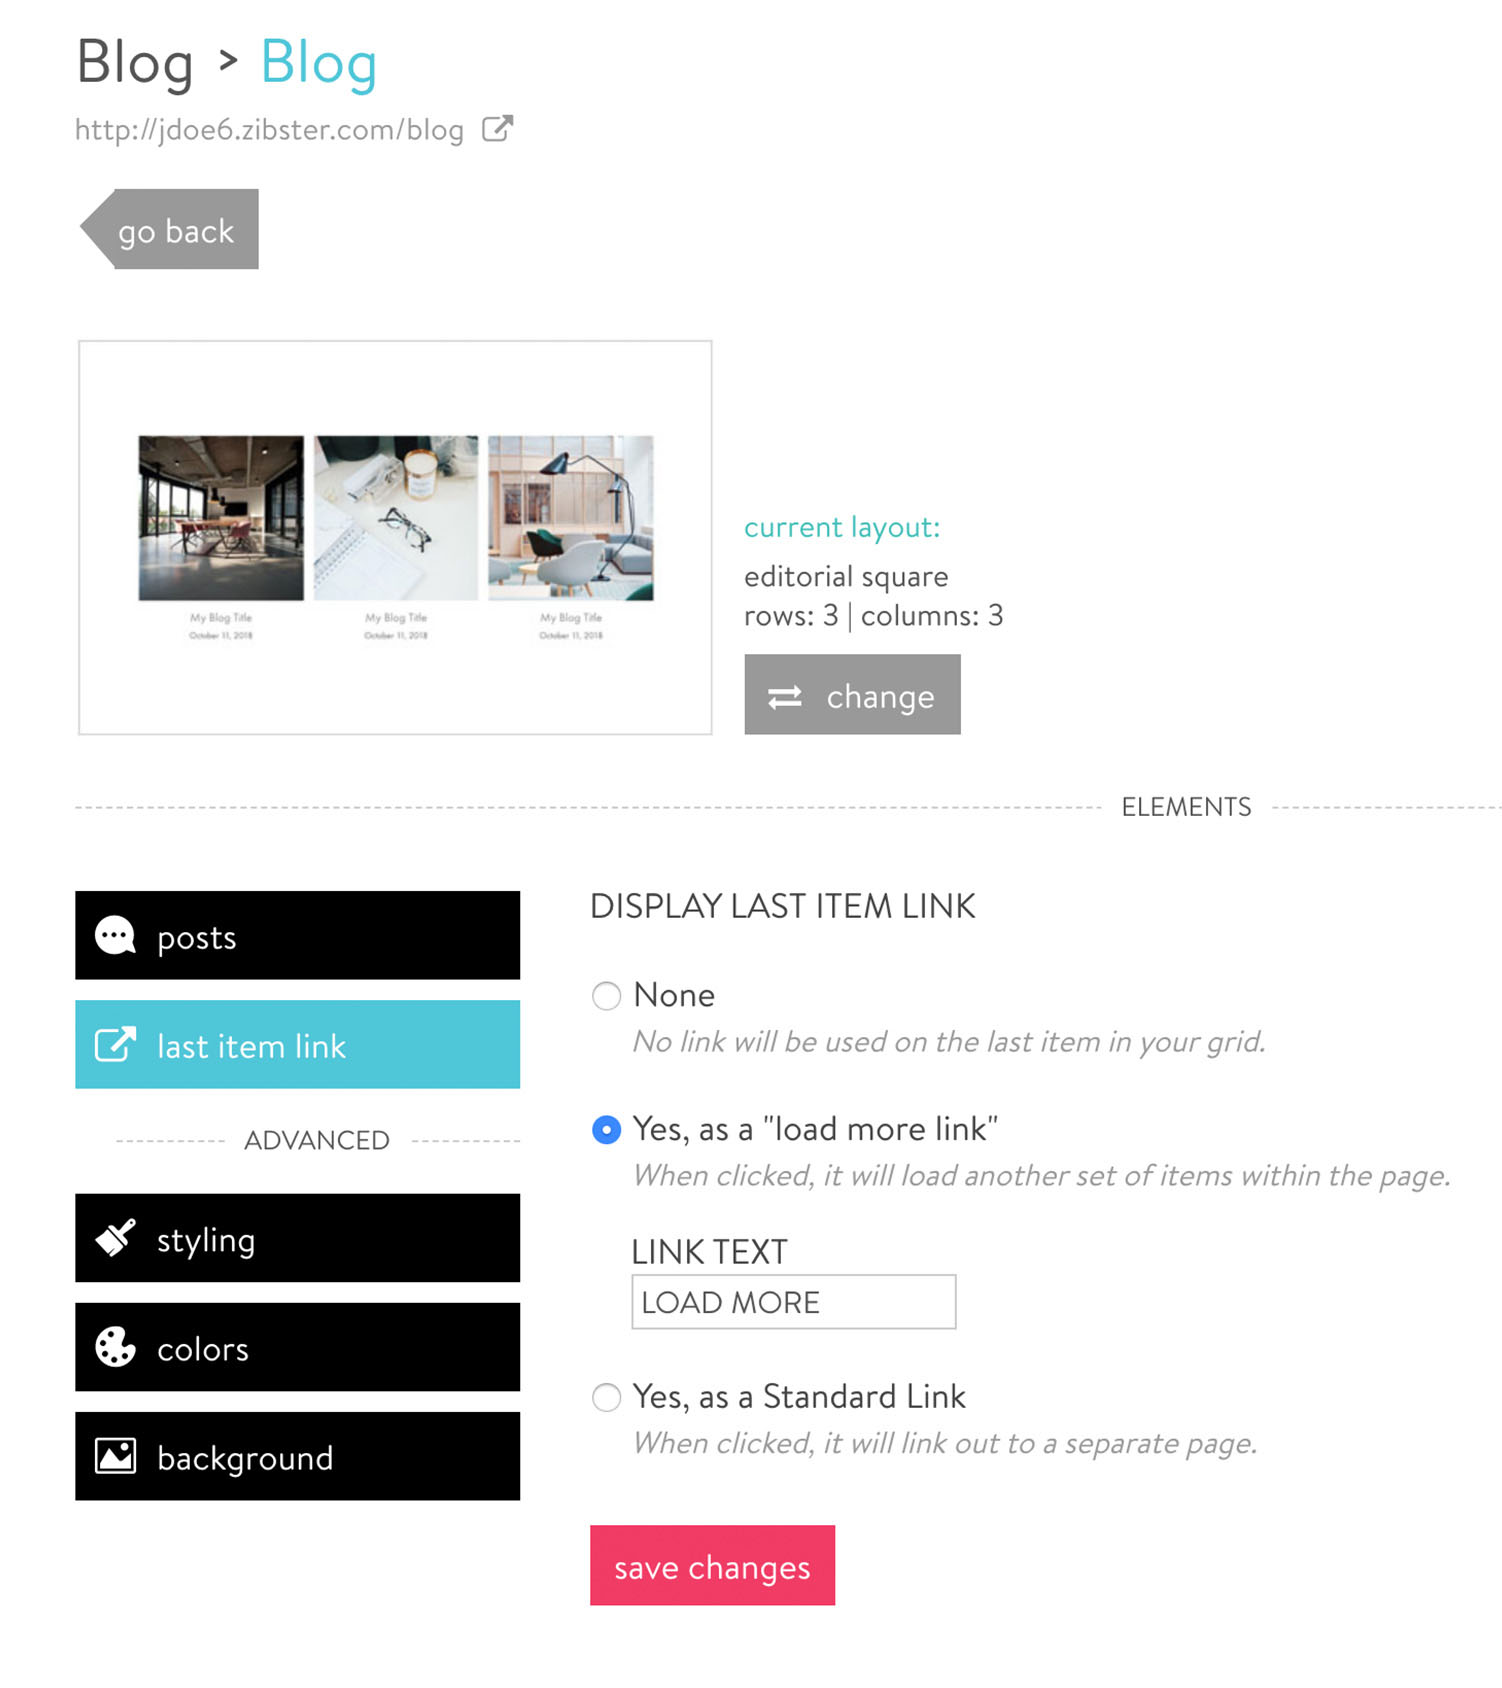
You have a few options how the LAST ITEM LINK displays:
None: No Link will display. if you choose this option once you past the chosen amount to display, every new one will push the other one off the page. Recommended for Home pages.
Yes, as a "Load More Link": When clicked it will load another set of blogs. You can choose what text is displayed here. Recommended for large blog pages with a lot of posts.
Yes, as a Standard Link: When clicked, It will link to a separate page. Recommended for standalone pages with tag blog post or for third party blog resources or older blogs that are still active elsewhere.
Once you have selected how your blog posts will look, you SAVE your selections and return to the page builder by clicking GO BACK.
Load your page you're working on the front end, make sure it is displaying your blogs and styled the way you want.
Adding a Search Function to Your Site
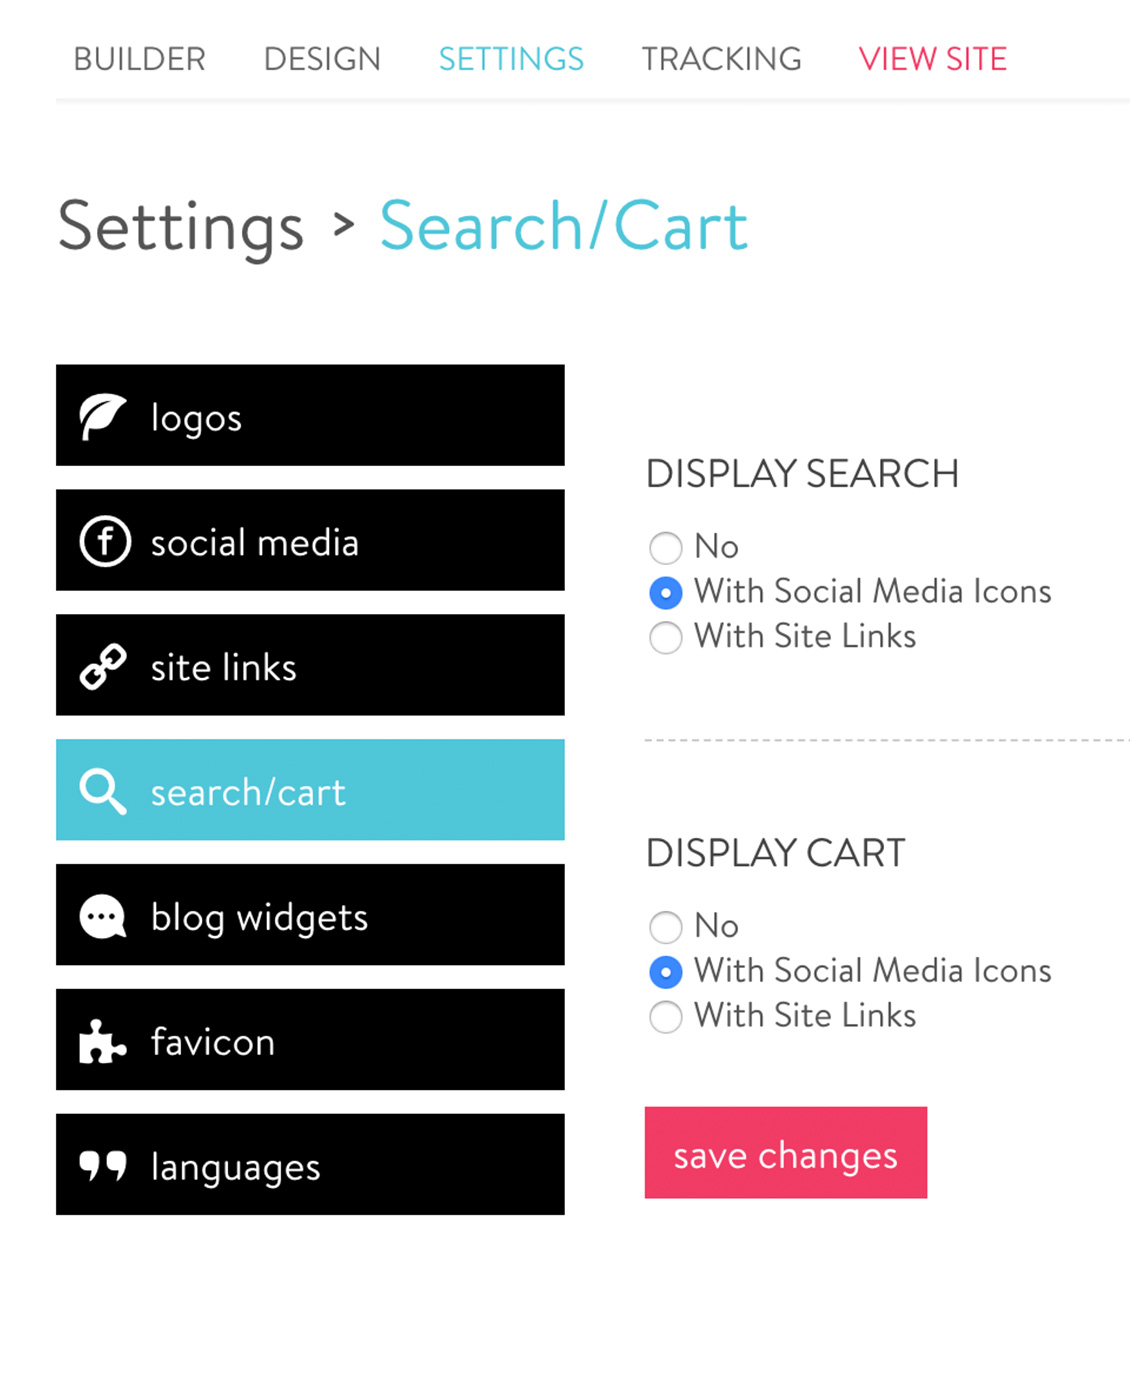
Having a search bar on your site enables people to quickly and easily find your blog posts and store items associated with specific tags. For example, if someone searches 'Summer Menu', your blog posts with your summer menu will appear. To enable search on your site, in the website builder section, click SETTINGS at the top.
Then click the SEARCH/CART tab. Next, select how the search bar will display:
No: This means a search bar will not display.
With Social Media Icons: This means the search bar will display next to the social media icons.
With Site Links: This means the search bar will display next to your navigation menu.
Once you choose your preferred display method, CLICK SAVE, and a search function will be on your site.
Sharing Your Blog Posts
You can easily share your blog posts from within the Zibster control panel. Navigate to the BLOG BUILDER tab and click on the blog post you want to share. Once you're in the post editor, in the top right portion of the post, you will see the SHARE button. There are options to share: direct email or on social media.
Sharing your blog is a great way to get it out in the world for everyone to read and in the process learn more about your business!
Here are a few tips for blogging:
-
Tag your posts.
-
Include 250-300 words in each blog post.
-
Include calls-to-actions.
-
Add meta data to your post for SEO.
-
Share your post through social media and direct emails to drive people to your website.
Facebook Live Event
The Zibster Blog Builder is an incredible tools that is easy to use and helpful for organizing your sites search and powering up your SEO. Sharing your blog will drive traffic to your site from social media and may help generate better sales and engagement. If you need help your blog set up, our support team can assist you. Give us a call at (844) 353-3412 or submit a support ticket, we're happy to help you.


Leave a comment
0 Comments